Singapore
 Australia
 Indonesia
 Japan
Japan Malaysia
 New Zealand
 Philippines
 South Korea
 Taiwan
 Thailand
 VIETNAM
So, you’re thinking about using a shipping container for your next project, huh? They seem like a neat idea, right? Super strong, easy to move, and kind of trendy. But hold on a sec, before you get too excited, there are definitely some things you need to know. It’s not always as simple as just dropping a container down and calling it a day. There are a bunch of potential headaches and limitations that come with these metal boxes. Let’s break down what those might be so you can make a smart decision.
Key Takeaways
- Getting the green light from your local government can be tricky, with zoning rules and permits often causing delays for shipping container projects.
- These steel boxes get really hot and really cold, so you’ll likely need to spend extra on insulation and climate control to make them comfortable.
- Changing a shipping container, like cutting holes for windows or doors, can get expensive and requires special skills to do it right.
- The industrial look of a shipping container might not fit every business’s vibe, and making it look good can add to the overall cost.
- You can’t just put a shipping container anywhere; it needs a solid foundation to stay stable, which adds to the project’s expense.
Navigating Zoning Laws And Permits For Shipping Containers
So, you’ve got this awesome idea to use a shipping container for something cool – maybe a backyard office, a small shop, or even a guest house. It sounds pretty straightforward, right? Just plop it down and you’re good to go. Well, not so fast. Before you get too excited and start picturing your new space, you’ve got to deal with a bunch of local rules and paperwork. It’s not always as simple as just buying a container and having it delivered.
Understanding Local Zoning Designations
First things first, you need to figure out what the rules are for your specific piece of land. Every area has zoning laws, which basically say what kind of buildings are allowed where and how they can be used. Some places are super chill about containers, while others might have strict rules, especially if you’re thinking about using it for business or living. You can usually find this info on your city or county’s website, or by calling the planning department. It’s a good idea to check this before you even look at buying a container.
The Permit Process For Shipping Container Projects
Once you know where you can put it and what you can do with it, you’ll probably need permits. This is where things can get a bit slow. You might have to fill out a bunch of forms, maybe even get some drawings done, and submit them to the local government. They’ll look everything over to make sure it follows building codes and safety standards. This whole thing can take weeks, or even months, so you really need to plan for that. It’s not just a quick sign-off.
Here’s a general idea of when you might need a permit:
- The container will be on your property for more than 30 days.
- You plan to use it as a place to live or work.
- You’re connecting it to utilities like water or electricity.
- It’s going to be permanently attached to a foundation.
Compliance With Building Codes
Even if you get the zoning and permits sorted, your container project still needs to play by the rules. This means making sure it meets local building codes. If you’re just using it for basic storage, the rules might be simpler. But if you’re modifying it – adding windows, insulation, plumbing, or electricity – it’s treated more like a regular building. You’ll need to make sure everything is up to code for safety and habitability. This can include things like:
- Proper insulation and ventilation, especially if you’re in a climate with extreme temperatures.
- Electrical and plumbing systems that meet all local regulations.
- Ensuring there are safe ways to get in and out, like proper doors and windows (egress).
Don’t forget about your Homeowners Association (HOA) if you have one. Even if the town says it’s okay, your HOA might have its own rules that could prevent you from using a shipping container on your property. Always check those covenants, conditions, and restrictions (CC&Rs) too.
Addressing Environmental Control Challenges With Shipping Containers
So, you’ve got your shipping container, maybe for on site storage containers or a new workshop. They’re tough, sure, but they’re also basically giant metal boxes. And metal, well, it doesn’t do the best job of keeping temperatures steady. Think about a car parked in the sun – it gets hot fast, right? A shipping container is kind of the same deal, but on a bigger scale.
Steel’s Impact On Temperature Regulation
This is the big one. Steel is a fantastic conductor. That means on a sunny day, it’s going to soak up heat like a sponge and radiate it right into your space. Conversely, when it’s cold outside, that steel is going to get frigid and let all that chill seep in. Without some serious help, your container can become an oven in the summer and a freezer in the winter. This makes it really tough to use the space comfortably for any length of time, whether you’re working, storing sensitive items, or just hanging out.
The Necessity Of Insulation And Ventilation
Because of how steel acts, you absolutely have to insulate your container. This isn’t just about making it cozy; it’s about making it functional. Good insulation acts as a barrier, keeping the outside temperatures from messing with your inside climate too much. But insulation alone isn’t the whole story. You also need ventilation. This is key for a few reasons:
- Air Quality: It keeps the air fresh and stops it from getting stale.
- Moisture Control: It helps move out humid air, which is super important.
- Temperature Balance: Good airflow can help regulate temperature a bit, especially when combined with insulation.
Preventing Condensation And Rust
This is where insulation and ventilation really pay off. When warm, moist air inside your container hits the cold steel walls, you get condensation. It’s like dew forming on a cold glass. Over time, this moisture can lead to mold and, more importantly, rust. Rust is the enemy of steel, and it can seriously weaken your container. Proper insulation and ventilation work together to stop that moisture buildup before it becomes a big problem. It’s a bit like building a box within a box to create a stable environment, and it’s something you really can’t skip if you want your container to last and be usable.
Dealing with the temperature swings in a shipping container requires a proactive approach. Simply putting a heater or air conditioner inside won’t be very effective or efficient without a well-sealed and insulated shell. You’re essentially building a controlled environment within the container itself.
Potential Health And Safety Concerns With Shipping Containers
So, you’re thinking about using a shipping container for your next project, huh? They seem like a neat idea, right? Super strong, easy to move, and kind of trendy. But hold on a sec, before you get too excited, there are definitely some things you need to know. It’s not always as simple as just dropping a container down and calling it a day. There are a bunch of potential headaches and limitations that come with these metal boxes. Let’s break down what those might be so you can make a smart decision.
Addressing Previous Cargo Contents
These containers have seen a lot of action before they get to you. They’ve hauled everything from raw materials to finished goods, and sometimes, that means residues are left behind. Think about it – what if it carried chemicals, or even food products that could leave behind microscopic traces? It’s super important to know what was in there before you start planning your new space. If you’re buying a used container, ask about its history. If you can’t get a clear answer, or if it previously held anything questionable, you might need to go through a thorough cleaning process. This is especially critical if you plan to use the container for living quarters, a kitchen, or any space where people will spend a lot of time.
Chemical Treatments and Contamination Risks
To keep these metal boxes from rusting and to ward off pests during their long journeys, they often get treated with chemicals. Some of these treatments, like those involving pesticides or sealants, can be pretty nasty. If not handled or cleaned properly, these chemicals could stick around. This is a big deal if you’re planning to use the container for something where people will be spending a lot of time, like an office, a shop, or even a home. You don’t want lingering fumes or residues causing problems down the line. When looking at containers, ask about the treatments used. If you’re doing the work yourself, make sure you use proper safety gear like gloves and masks when cleaning or modifying the container.
Safe Modification Practices
Cutting into a shipping container to add windows, doors, or other features isn’t like cutting drywall. These are structural elements. If you cut in the wrong spot or remove too much material without proper reinforcement, you can weaken the entire structure. This is where specialized skills come into play. You need to understand how the container’s frame works and how to maintain its structural integrity after making alterations. This means using the right tools, reinforcing cut areas, and making sure any new additions are securely attached. It’s not just about making it look good; it’s about making it safe and sound for whatever you plan to use it for.
Here are some things to keep in mind:
- Know the History: Always try to find out what the container previously carried and what treatments it received.
- Clean Thoroughly: If there’s any doubt about previous contents or treatments, a deep clean is a must.
- Ventilate Properly: Ensure good airflow, especially during and after modifications, to clear out any dust or fumes.
- Reinforce Cuts: When adding openings, make sure to add framing to support the structure.
- Use Protective Gear: When cleaning or cutting, wear gloves, eye protection, and a mask.
When you’re looking at used shipping containers, it’s easy to get caught up in the cool factor and the potential savings. But taking a moment to think about what might be lurking inside or how it was treated is a really smart move. It’s about making sure your project is not just unique, but also safe and healthy for everyone involved.
Modifying Shipping Containers: Costs And Considerations
The Expense Of Structural Alterations
So, you’ve got your shipping container, and you’re ready to make it your own. That’s great! But before you grab a saw, let’s talk about the money. Cutting into these metal boxes isn’t like slicing through drywall. These containers are engineered for strength, and making big openings for windows, doors, or even just extra ventilation can weaken the whole structure. You’ll likely need to reinforce the cuts with extra steel framing. This means hiring someone who knows what they’re doing, and that adds to the bill. It’s not just about the labor; the materials for reinforcement add up too. What seems like a simple cut can quickly become a significant expense.
Specialized Skills For Modifications
When you’re modifying a shipping container, you’re not just doing basic DIY. Think about welding, metal fabrication, and understanding structural integrity. These aren’t skills most people have lying around. You might need to find a contractor who specializes in container modifications. They have the right tools and the know-how to cut, weld, and reinforce the container safely. This specialized work comes at a higher price than standard construction labor. It’s worth it to get it done right, but it’s definitely a cost to factor in.
Maintaining Structural Integrity
This is a big one. Shipping containers are designed to be stacked and moved, so their strength is in their corners and their corrugated walls. When you start cutting holes, you’re compromising that strength. You have to be really careful about where you cut and how you reinforce it. A poorly modified container can sag, warp, or even collapse. This isn’t just about aesthetics; it’s about safety. You need to make sure that after all the cutting and adding, your container is still as strong as it needs to be for its intended use. This often means consulting with an engineer, which is another cost.
Here’s a look at some common modification costs:
| Upgrade Type | Potential Cost Range (USD) | Notes |
|---|---|---|
| Custom Windows/Doors | $1,000 – $5,000+ each | Size, material, and complexity matter |
| Reinforcement Framing | $500 – $3,000+ | For large openings like doors or windows |
| Exterior Paint | $500 – $3,000+ | Basic vs. custom murals |
| Cladding (Wood/Metal) | $3,000 – $15,000+ | Depends on material and coverage |
Remember, the initial purchase price or storage container rental cost is just the beginning. The real investment often comes in making the container suitable for its new purpose. Don’t forget to factor in the costs associated with permits, utility hookups, and potential site preparation, as these can significantly increase the overall storage container rental cost or project budget.
Space Limitations And Design Challenges Of Shipping Containers
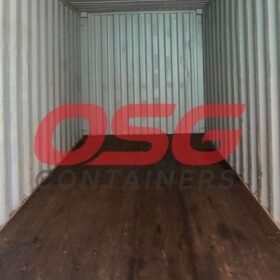
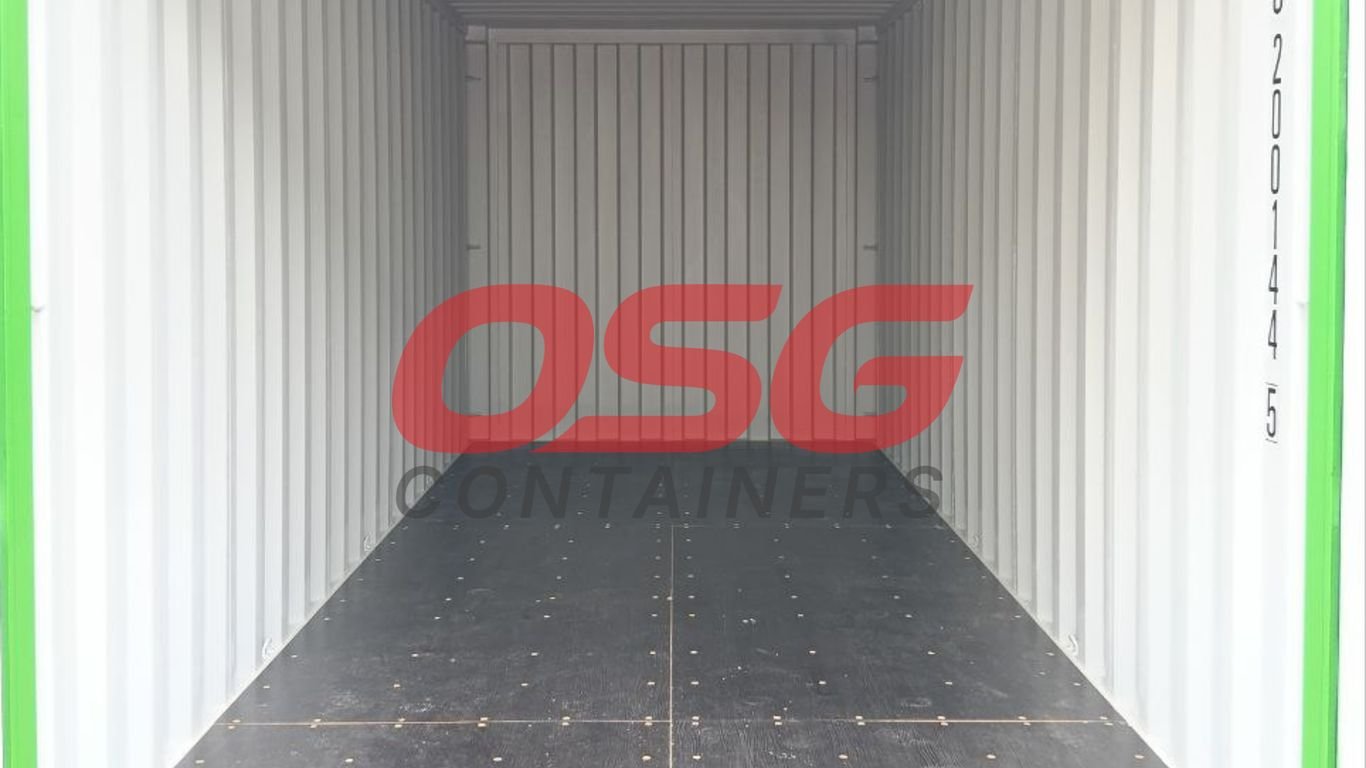
Shipping containers are, by their very nature, standardized boxes. This means their dimensions are fixed, which can present some real design hurdles. You can’t just magically make a 40-foot container wider or taller. You have to work within the confines of what you’ve got. This often means getting really creative with how you lay out your space and use every single inch. It’s not like a traditional build where you can easily add on a bay window or extend a room. For onsite storage containers, this might mean you can’t fit as much as you initially thought, forcing you to be more selective about what you store.
Understanding Usable Square Footage
When you look at a shipping container, the listed dimensions are for the exterior. The interior space is significantly less due to the thickness of the walls, the corrugations, and any internal framing or insulation you might add later. It’s easy to overestimate how much usable room you actually have. For example, a standard 40-foot container might have an interior length of around 38 feet, but the width and height are also reduced. This means you need to do some careful measuring and planning before you start designing.
Here’s a rough idea of interior space:
| Container Size | Interior Length (approx.) | Interior Width (approx.) | Interior Height (approx.) |
|---|---|---|---|
| 20ft Standard | 18′ 10" | 7′ 8" | 7′ 10" |
| 40ft Standard | 38′ 10" | 7′ 8" | 7′ 10" |
| 40ft High Cube | 38′ 10" | 7′ 8" | 8′ 10" |
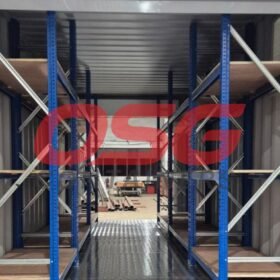
Maximizing Limited Space With Design
Because the space is limited, smart design is key. Think about multi-functional furniture that can serve more than one purpose. Fold-down tables, beds that tuck away, and built-in storage solutions are your best friends here. Vertical space is also your friend; using shelves that go all the way to the ceiling can add a surprising amount of storage without taking up floor space. Open-plan layouts can make the space feel bigger, but you still need to consider how to define different areas without using solid walls that eat up room.
- Multi-functional furniture: Opt for pieces that can transform, like a sofa that converts into a bed or a desk that folds out from the wall.
- Vertical storage: Install shelving units that reach high ceilings to maximize storage capacity.
- Light colors and mirrors: Using lighter paint colors and strategically placed mirrors can make the interior feel more open and airy.
- Clever layout: Plan the flow of the space carefully to avoid dead zones and ensure easy movement.
The fixed dimensions force a kind of minimalist approach. You really have to think about what you need and how to make it fit efficiently. It’s not about cramming things in; it’s about smart, intentional use of every square foot.
Combining Containers For Expanded Space
If a single container just isn’t enough, you can combine multiple containers. This opens up a lot more possibilities for layout and square footage. You can place them side-by-side, end-to-end, or even stack them. However, joining containers isn’t as simple as just parking them next to each other. You’ll need to cut openings between them, reinforce the structure where they join, and ensure everything is sealed properly to prevent leaks. This adds complexity and cost to the project, but it’s often the best way to get the space you need.
Foundation Requirements For Shipping Container Stability
So, you’ve got a shipping container, and you’re thinking about what to do with it. Maybe it’s a cool tiny home, a backyard office, or just extra storage. Whatever the plan, one thing you absolutely can’t skip is a solid foundation. These metal boxes are tough, sure, but they’re not meant to just sit directly on the dirt or grass. Doing that can lead to all sorts of headaches down the road.
Preventing Structural Issues With Proper Foundations
Think about it: if your container isn’t sitting perfectly level, things start to go wrong. Doors might not close right, making them a pain to open and shut. Inside, any shelves or built-in structures could get warped. And on a bigger scale, the whole structural integrity of the container could be compromised. A good foundation keeps everything stable and square. It’s the base that stops your container from settling unevenly, which is a big deal for its long-term health.
Protecting Against Moisture And Pests
Water is the enemy of steel, plain and simple. When a container sits directly on the ground, moisture can get trapped underneath. This is a fast track to rust and corrosion, which weakens the metal over time. A proper foundation lifts the container off the ground, allowing air to circulate. This helps water drain away and keeps the bottom of the container dry. Plus, it makes it a lot harder for critters like rodents or insects to crawl underneath and make a home there.
Impact On Overall Project Costs
Okay, let’s talk money. Adding a foundation might seem like an extra expense you could skip to save cash upfront. But honestly, it’s more like an investment. Skipping it can lead to costly repairs later on if things start to warp, rust, or settle. The type of foundation you choose will affect the price, of course.
Here’s a quick look at some common options:
| Foundation Type | Potential Cost (USD) | Notes |
|---|---|---|
| Gravel Pad | $500 – $2,000+ | Needs good drainage; best for lighter loads |
| Concrete Piers | $1,000 – $4,000+ | Good for uneven ground; less material |
| Full Concrete Slab | $3,000 – $10,000+ | Most stable and permanent; higher cost |
It’s way better to budget for a foundation from the start than to deal with problems later. It’s a necessary step for most uses, especially if you want your container project to last.
Building a solid base isn’t just about making things look good; it’s about making sure your container structure is safe, stable, and lasts for years to come. It’s the first step in turning a simple box into something functional and reliable.
Aesthetic Considerations For Shipping Container Projects
The Industrial Look Of Shipping Containers
Shipping containers have a very distinct, industrial look. That corrugated steel and utilitarian design are pretty obvious. For some projects, like a trendy cafe or a workshop, this look might be exactly what you’re going for. It screams rugged and functional. But if you’re aiming for something more polished, like a retail shop or an office space, that raw look might not quite fit the bill. You really have to think about whether that factory-fresh vibe matches the image you want to project. It’s not just about looking cool; it’s about attracting the right people.
Enhancing Visual Appeal
Luckily, you’re not stuck with the standard container look. There are plenty of ways to change it up. You can add exterior cladding, like wood panels or even some modern composite materials. Painting is an easy win, and you can get really creative with colors or even a mural. Adding custom windows and doors can also totally change the feel of the place. It’s all about making it look less like a cargo box and more like a building that belongs.
Here’s a quick look at some common upgrades:
- Exterior Paint: From a simple coat to a complex mural, paint can transform the surface. Costs can range from $500 to $3,000 or more.
- Cladding: Adding materials like wood or metal panels can completely disguise the container. This can cost anywhere from $3,000 to $15,000+ depending on the material and how much you cover.
- Custom Windows & Doors: Swapping out standard openings for something more unique can make a big difference. Expect to pay $1,000 to $5,000+ per unit, depending on size and style.
Fitting Business Or Home Aesthetics
Who are you trying to reach with your space? If you’re targeting a younger, eco-conscious crowd, the raw container look might actually be a plus. But if you’re aiming for a more traditional or upscale market, you’ll definitely need to invest in making it look more refined. It’s a balancing act between the container’s inherent character and what your customers or visitors expect. Even for something like construction site storage container needs, a bit of thought can make it look less out of place.
Making a shipping container look like a conventional building often means covering up its original form. This involves adding layers and design elements that can significantly increase the project’s budget and complexity. It’s a trade-off between the container’s initial affordability and the desired final appearance.
So, What’s the Verdict?
Look, shipping containers are pretty neat for certain projects. They can be cheaper and faster to get going than building from scratch, and hey, it’s good for the planet too. But, it’s not all smooth sailing. You’ve got to deal with permits, figure out how to keep them from becoming ovens in the summer or freezers in the winter, and sometimes cutting into them to make them livable or usable costs a pretty penny. Plus, not everyone loves the look. So, before you jump in, really think about what you need, where you’re putting it, and if you’re ready for the extra work. It can work out great, but you gotta go in with your eyes open.
Frequently Asked Questions
What legal rules do I need to follow when using shipping containers?
You’ll need to check local laws about where you can place and use shipping containers, as some areas have specific rules. Getting permits can also take time, so it’s a good idea to talk to local officials early on to make sure your project is allowed and follows all the rules.
Why is temperature control a problem with shipping containers?
Shipping containers are made of metal, which gets very hot in the sun and very cold when it’s chilly. To make them comfortable inside, you’ll need to add insulation and ensure good airflow, which can increase the cost and effort.
Is it expensive to change a shipping container?
Making big changes, like cutting openings for windows or doors, can cost a good amount of money. You might also need special workers for these jobs. Adding things like electricity, water pipes, and heating or cooling systems will also add to the price.
Can shipping containers look nice for a business?
Yes, they can! While they have an industrial look, you can enhance their appearance with paint, cladding, and landscaping to match your business’s style. It might cost a bit extra, but it’s definitely possible to make them look great.
Do shipping containers need a special base?
Yes, they do. A shipping container needs a solid foundation to keep it stable and prevent issues like doors sticking or the structure weakening. This also helps protect against moisture and pests, but it adds to the overall project cost.
What should I know about what a used container might have carried?
Before using a used container, it’s important to find out what it previously carried. Some containers may have transported chemicals or other goods that could leave residues. Also, they might have been treated with chemicals to prevent rust, which could be a health concern if not handled properly.