Singapore
 Australia
 Indonesia
 Japan
Japan Malaysia
 New Zealand
 Philippines
 South Korea
 Taiwan
 Thailand
 VIETNAM
So, you’re thinking about getting a shipping container, huh? Maybe for extra storage, a cool backyard office, or even a tiny home. They seem like simple metal boxes, but turning one into something useful takes a bit more thought than you might expect. This guide will walk you through everything you need to know, from picking the right container to making sure it’s all legal and safe. We’ll cover the basics and some of the more involved stuff, so you can get your shipping container project done right.
Key Takeaways
- When choosing a shipping container, think about whether new or used is best for your budget and needs. Always ask questions before you buy.
- Clearly define what you want to do with your shipping container before you start planning any modifications. A good layout and budget are key.
- Start with simple modifications like adding doors or windows, and reinforce any cuts you make to keep the container strong. Insulation and ventilation are important for comfort.
- Think about how you want the inside to look and function, and how you want the outside to appear. Don’t forget about adding power and water if you need them.
- Always check local rules like zoning laws and building codes. Find reliable people to do the work and watch out for scams.
Choosing Your Shipping Container
Understanding Different Shipping Container Types
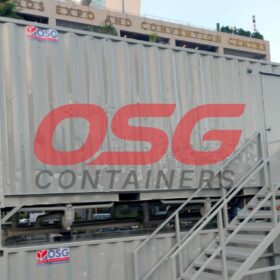
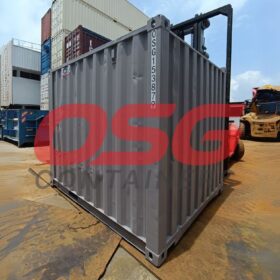
So, you’re looking into getting a shipping container. That’s cool. They’re basically giant metal boxes, right? Well, yes, but there’s more to it than just grabbing any old box. Not all containers are made the same, and picking the wrong one can lead to headaches later on. The most common type you’ll see is the standard dry storage container. These are usually 8 feet wide, 8.5 feet tall, and come in lengths like 20 ft or 40 ft. The 20 ft container is a really popular choice for a lot of projects because it’s a good size – not too big, not too small.
But wait, there are other kinds too! You’ve got high cubes (which are taller), open tops, flat racks, and even ones with double doors. The type you need really depends on what you plan to do with it. Are you just storing some tools, or are you trying to build a tiny home? Think about what you’ll be putting inside and how often you’ll need to get to it.
The world of shipping containers is bigger than you might think. Don’t just assume one size or style fits all. A little research upfront saves a lot of trouble later.
New Versus Used Shipping Container Considerations
Now, the big question: new or used? New containers are shiny and probably won’t have any hidden rust spots. They’re built tough and designed to last. However, they come with a higher price tag. Used containers, on the other hand, are way more affordable. Think of them as having already lived a life at sea and now ready for their next adventure on land. Many used containers are still in great shape and can last for decades with proper care. They’ve already been through the roughest parts of their journey, so you know what you’re getting.
Here’s a quick rundown:
- New Containers:
- Higher cost
- Pristine condition
- Longest potential lifespan
- Used Containers:
- Lower cost
- May have minor cosmetic wear (dents, scratches)
- Still very durable and long-lasting
- More environmentally friendly (repurposing)
For most people looking to repurpose a container, a used one is often the sweet spot. You save money and still get a solid, reliable structure.
Key Questions to Ask Before Buying a Shipping Container
Before you hand over any cash, do yourself a favor and ask some questions. It’s like dating – you want to know what you’re getting into.
- What’s its history? Has it been used for hazardous materials? You don’t want your new garden shed smelling like old chemicals.
- What’s the condition? Look for rust, especially around the roof and floor. Check the doors and seals – do they close properly?
- Where will it be delivered? Make sure the delivery truck can actually get to your site. Some containers are heavy and need specific equipment to unload.
- What are the dimensions? Double-check the exact measurements. A 20 ft container might seem straightforward, but confirm the interior space you’ll actually have to work with.
- Are there any hidden fees? Ask about delivery costs, taxes, or any other charges you might not be expecting.
Planning Your Shipping Container Project
So, you’ve got your eye on a shipping container, maybe a sturdy 20 foot sea container, and you’re ready to make it your own. That’s awesome! But before you start dreaming about paint colors and furniture, let’s talk about getting the plan right. This is where the real magic happens, turning a metal box into something truly useful.
Defining the Purpose of Your Shipping Container
First things first, what exactly do you want this container to do? Is it going to be a backyard workshop, a cool little office space, extra storage for your business, or maybe even a tiny home? Your purpose is the North Star for this whole project. It dictates everything from the size of the container you’ll need to the kinds of modifications you’ll have to make. Trying to turn a storage unit into a living space without thinking about insulation and ventilation first? That’s a recipe for a sweaty, uncomfortable disaster.
- Home Office: Needs good lighting, climate control, and maybe some soundproofing.
- Storage Unit: Focus on security, weatherproofing, and easy access.
- Workshop: Think about ventilation, power outlets, and space for tools.
- Retail Pop-Up: Consider visibility, customer flow, and a welcoming exterior.
Thinking through the end-use from the get-go saves a ton of headaches and money down the line. It’s like packing for a trip – you wouldn’t just throw random stuff in a bag, right? You pack for where you’re going and what you’ll be doing.
Drafting a Layout for Your Container Space
Once you know the ‘why,’ it’s time for the ‘where.’ Grab some graph paper or use a simple design app. Sketch out where doors and windows will go. Where will your desk sit? Where do you need shelves? Don’t forget to account for wall thickness, especially if you plan on adding insulation. A 20 foot sea container might seem spacious, but once you add walls and furniture, that space shrinks fast. Think about how you’ll move around in the space. Is there enough room to walk? Can you open doors and drawers without hitting anything?
Here’s a quick look at how space might be allocated:
| Area | Percentage of Space (Approx.) |
|---|---|
| Main Workspace/Living Area | 60% |
| Storage/Shelving | 20% |
| Entryway/Hall | 10% |
| Utility/Technical Space | 10% |
Budgeting for Your Shipping Container Project
Okay, let’s talk money. Shipping containers themselves can be a pretty affordable starting point, but the modifications can add up quickly. You’ll need to factor in the cost of the container, delivery, any permits you might need, materials for insulation, flooring, windows, doors, electrical work, and labor if you’re not doing it all yourself. It’s always a good idea to add a buffer – maybe 10-20% – for unexpected costs. Things always pop up, you know?
- Container Purchase & Delivery
- Permits & Inspections
- Structural Modifications (cutting, welding)
- Insulation & Interior Walls
- Windows & Doors
- Electrical & Plumbing
- Flooring & Paint
- Contingency Fund
Essential Shipping Container Modifications
So, you’ve got your shipping container, and now it’s time to make it actually useful. This is where the fun really begins, turning that plain metal box into something that works for you. Don’t worry, you don’t need to be a master welder to get started. There are plenty of ways to modify these things, from simple tweaks to bigger changes.
Basic Modifications for Beginners
If you’re new to this, start with the basics. These are the kinds of changes that make a big difference without requiring a ton of specialized skills or tools. Think about adding some openings for light and air, or maybe just making it look a bit nicer.
- Cutting openings: Need a window or a door? You’ll have to cut through the steel. Make sure to reinforce the edges with some metal framing so the container stays strong. Measure twice, cut once, as they say.
- Painting and sealing: A good coat of paint does more than just make it look good; it protects the metal from rust. Use a primer made for metal and a tough top coat. Seal up any gaps around doors and windows to keep the weather out.
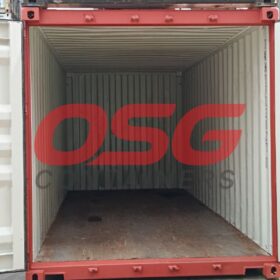
- Adding flooring: The original metal floor is okay, but adding some plywood or vinyl planks makes it feel more like a finished space.
Structural Modifications and Reinforcements
Sometimes, you need to do more than just cut holes. If you’re planning on stacking containers, adding heavy equipment inside, or making significant changes, you’ll need to think about the structure. This might involve adding extra steel supports or even modifying the container’s frame. For specialized uses, like transporting liquids, you might even look into something like an isotank, which is a specialized container designed for that purpose, though that’s a whole different ballgame.
Improving Comfort with Insulation and Ventilation
Steel containers can get really hot in the summer and cold in the winter. If you plan on spending any time inside, or storing things that need a stable temperature, insulation is a must. You can use spray foam, rigid panels, or even fiberglass batts. Don’t forget ventilation! Adding vents or a small fan system will keep the air moving and prevent moisture buildup. This is especially important if you’re looking at something like open top containers, where weather protection is already a bit more of a challenge.
Making these modifications can seem daunting, but breaking them down into smaller steps makes the process much more manageable. Focus on one change at a time and plan your work carefully.
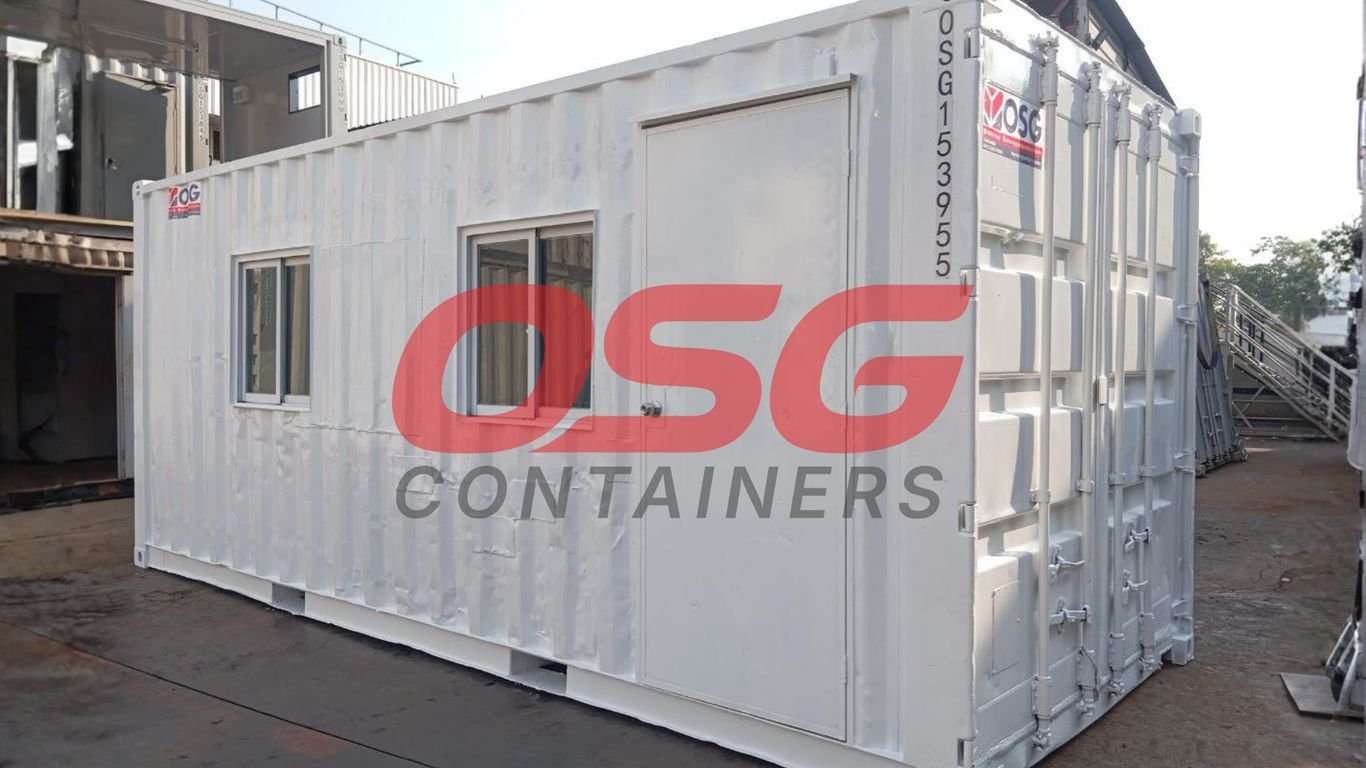
Enhancing Your Shipping Container’s Functionality
So, you’ve got your container, maybe you’ve even done some basic work on it. Now it’s time to really make it work for you. This is where we get into making it more than just a metal box. We’re talking about making it useful, comfortable, and maybe even a little bit fancy.
Interior Customization Options
Think about what you’ll actually be doing inside your container. If it’s just for storing tools, maybe some sturdy shelves are all you need. But if you’re planning to work in there, or even live in it, things get more interesting. You can add walls to create separate rooms – a little office nook, a storage closet, whatever. Flooring is another big one; that bare metal can be cold and noisy. Laying down some plywood, vinyl, or even laminate can make a huge difference in how it feels. And don’t forget lighting! A few well-placed LED fixtures can turn a dark space into a bright, usable area. Custom shelving units, built-in desks, or even a small kitchenette can transform the space.
- Shelving and Storage: From simple bolt-on shelves to custom-built units, organize your items efficiently.
- Room Dividers: Use drywall, wood paneling, or even curtains to create distinct zones within the container.
- Flooring: Upgrade from the basic metal floor with options like plywood, rubber mats, or vinyl planks.
- Lighting: Install overhead lights, task lighting, or even natural light sources like skylights.
The interior of your container is a blank canvas. Plan how you’ll use each section to maximize space and create a functional layout that suits your specific needs. Don’t just throw things in; think about workflow and accessibility.
Exterior Aesthetics and Protection
Let’s be honest, a plain shipping container isn’t exactly a looker. But you can change that! Painting is the easiest way to give it a facelift. You can go for a simple color, or get creative with designs. More importantly, paint and other coatings protect the steel from rust and the elements. You might also consider adding a more permanent roof, especially if you’re worried about water pooling or want to add insulation on top. Think about how the container sits on its foundation too – making it look more permanent and less like it’s just parked there.
- Paint and Coatings: Use high-quality, weather-resistant paint, ideally marine-grade, to prevent rust and add color.
- Cladding: For a more finished look, consider adding wood, metal, or composite siding.
- Roof Modifications: Options range from simple sealants to adding a pitched roof for better water runoff or even a green roof.
- Foundation: Ensure the container is properly leveled and secured on a stable foundation.
Installing Essential Utilities
This is where your container really starts to feel like a real space. If you need power, you’ll have to run electrical lines. This usually involves getting an electrician involved to do it safely. Same goes for plumbing if you’re thinking about a sink or a bathroom. Heating and cooling are also big considerations, especially if you plan to spend a lot of time inside. A simple window AC unit might work for a small space, but for larger or more permanent setups, you’ll want to look into proper HVAC systems. Getting these utilities sorted out is key to making your container comfortable and practical.
| Utility | Considerations |
|---|---|
| Electricity | Wiring, outlets, lighting, breaker box, connection to grid or generator. |
| Plumbing | Water supply lines, drainage, sewage connection, fixtures (sink, toilet, shower). |
| HVAC | Heating, ventilation, and air conditioning units, ductwork, insulation. |
| Internet/Phone | Cable runs, Wi-Fi setup, external antennas if needed. |
Navigating Legalities and Finding Professionals
Alright, so you’ve got your container picked out and you’re ready to start building. But hold on a sec, before you go cutting holes and welding things, we need to talk about the not-so-fun stuff: rules and people. It’s super important to get this right so you don’t end up with a giant metal headache.
Understanding Zoning Laws and Building Codes
This is where things can get a little tricky, and honestly, it’s different everywhere you go. Basically, your local town or city hall has rules about what you can build and where. These are called zoning laws. Some places are totally cool with container homes or offices, while others might have a big "no" sticker on them. You’ll also need to look into building codes. These are the safety rules that apply to pretty much any construction, and yes, that includes your container project. They cover things like how strong your foundation needs to be, how to wire electricity safely, and making sure you have enough ways to get out in a hurry.
Here’s a quick rundown of what you might run into:
- Permits: Most likely, you’ll need to apply for permits before you even start. This means showing them your plans and letting them check your work as you go.
- Foundation: Your container needs a solid base, just like a regular house. Codes will tell you what kind of foundation is acceptable.
- Utilities: If you’re adding plumbing or electricity, these systems have to meet strict safety standards.
- Egress: You need safe exits. This is especially important if your container will be used by the public.
- Fire Safety: There are rules about fire-resistant materials and smoke detectors.
It’s always best to talk to your local building department early on. They can tell you exactly what you need to do to stay on the right side of the law. Don’t skip this step – it can save you a lot of trouble down the road.
Selecting Qualified Contractors and Fabricators
Unless you’re a seasoned pro yourself, you’ll probably need some help. Finding the right people to do the work is key. You want folks who know their way around shipping containers specifically, not just general contractors. Look for people who have a portfolio of container projects they’ve done before.
Here’s how to find good help:
- Ask Around: Get recommendations from friends, family, or even the place you bought your container from.
- Check Reviews: Look online for reviews and testimonials. See what past clients have said about their experience.
- Get Multiple Quotes: Don’t just go with the first person you talk to. Get at least three quotes so you can compare prices and what’s included.
- Talk to Them: Have a good conversation. Do they listen to your ideas? Are they clear about the process? Good communication is a big deal.
Avoiding Shipping Container Scams
Sadly, there are people out there looking to take advantage of folks. Shipping container scams are a real thing. You might see ads with prices that seem too good to be true. Often, they are.
- Be Wary of Low Prices: If a deal seems way cheaper than everyone else’s, it’s a red flag. Get quotes from several reputable sellers to know the going rate.
- Read Reviews Carefully: Look for consistent positive feedback. A few bad reviews might be normal, but a lot of them? Run.
- Get Everything in Writing: Always have a formal contract that clearly outlines the work, materials, timeline, and payment schedule. Read the fine print before you sign anything.
- Trust Your Gut: If something feels off about a seller or contractor, it probably is. Don’t be afraid to walk away.
Maintaining Your Modified Shipping Container
So, you’ve gone through the whole process – picked out your container, maybe even had it modified into a cool tiny home or a workshop. That’s awesome! But here’s the thing: these metal boxes, while tough, aren’t completely maintenance-free. Think of it like owning a car; you wouldn’t just drive it forever without an oil change, right? Your container needs a little TLC too, especially after you’ve gone and cut holes in it for windows and doors.
Regular Inspections for Damage
This is probably the most important part. You’ve got to keep an eye on things. Rust is the big enemy here, especially where you’ve cut into the steel or done any welding. Check those spots regularly. Also, look for any dents or scratches that might be collecting water. Water sitting on metal is just asking for trouble down the line. It’s a good idea to keep a log of when you inspect and what you find, just so you don’t forget.
Here’s a quick checklist for your inspections:
- Structural Integrity: Look for any bending or warping, especially around openings you’ve made. Are the corners still solid?
- Rust Spots: Pay close attention to seams, corners, and any cut edges. Surface rust can be dealt with, but deep pitting is a bigger concern.
- Doors and Windows: Are the seals still good? Do they open and close smoothly? Check hinges and locks.
- Roof: Clear off any debris. If you have a sloped roof, make sure water can drain. If you’ve got a "green roof" or solar panels, check those systems too.
- Foundation: Is the container still sitting level? Any signs of shifting?
Ensuring Weatherproofing and Sealing
This ties right into inspections. Remember all those seals you put around windows and doors? They need to stay intact. Over time, weather can break them down. If you see any gaps or cracks, get them sealed up with good quality caulk. This stops water from getting in, which is key to preventing rust and mold inside. Don’t forget about the roof and any other openings you might have made. A little bit of preventative sealing now can save you a lot of headaches later.
Moisture is the silent killer of shipping containers. Whether it’s rain getting in through a bad seal or condensation building up inside due to poor ventilation, water is what causes rust and mold. Keeping your container dry and well-sealed is paramount to its longevity.
Addressing Issues Promptly for Longevity
When you find something, don’t just ignore it. That little rust spot? If you catch it early, a bit of sanding and a coat of rust-inhibiting paint will fix it right up. If you let it go, it can spread and become a much bigger, more expensive problem. The same goes for any damage to the seals or structural issues. Think of it like this: a quick fix now is way better than a major repair later. If you’re not comfortable doing the work yourself, find someone who is. It’s better to pay a professional for a small repair than to deal with a disaster.
The goal is to keep your container dry, rust-free, and structurally sound.
Wrapping It Up
So, there you have it. Shipping containers are pretty neat, right? They start as these big metal boxes for shipping stuff, but with a little planning and work, they can become almost anything you need – extra storage, a cool workshop, or even a unique office space. We’ve talked about how to pick the right one, what to look out for when buying, and some basic ideas for making it your own. Remember to think about what you really need before you buy, and don’t forget to check out the foundation and any local rules. It’s not rocket science, but taking your time will make sure your container project turns out great and lasts for years. Happy containerizing!
Frequently Asked Questions
What’s the difference between a new and a used shipping container?
New containers are like brand-new cars – more expensive but with no hidden issues. Used containers have traveled the world and are cheaper, but you need to check them carefully for wear and tear. They can still be great if they’ve been well-maintained!
Can I just put a shipping container anywhere?
Not exactly! You need to put it on a flat, solid surface, like concrete, to keep it from rusting from the bottom. Also, check local rules (zoning laws) to make sure it’s okay to have one where you want it.
What’s the first thing I should do before modifying a container?
First, figure out exactly what you want to do with it! Is it for storage, a workshop, or a tiny home? Knowing the purpose helps you plan everything else, like where windows and doors should go.
How do I make sure my container doesn’t get too hot or cold inside?
Steel containers can get really hot or cold. You’ll want to add insulation, like spray foam, to the walls and ceiling. Also, adding vents or a small air conditioner will help keep the air moving and the temperature just right.
Do I need special permission to build with a shipping container?
Yes, often you do. You’ll need to look into local building codes and zoning laws. These rules make sure your container project is safe and fits in with the neighborhood, just like any other building.
How often should I check on my modified container?
It’s a good idea to look it over regularly. Check for any rust, leaks, or damage, especially after bad weather. Keeping up with small fixes means your container will last much longer.