 Singapore
 Australia
 Indonesia
 Japan
Japan Malaysia
 New Zealand
 Philippines
 South Korea
 Taiwan
 Thailand
 VIETNAM
Thinking about renting a container for some extra space? It’s a pretty common solution these days, whether you’re moving, renovating, or just need to clear out some clutter. Renting a container can be a straightforward way to get that temporary storage you need without a huge commitment. We’ll break down what you need to know to make renting a container a smooth process.
Key Takeaways
- Figure out how much space you actually need and what kind of stuff you’ll be storing before you start looking.
- Container sizes vary, so pick one that fits your items without being too big or too small.
- Always read the rental agreement carefully, especially the part about fees and what happens if something gets damaged.
- Think about where the container will go and if you can easily get to it when you need to.
- Packing smart and securing your container properly will keep your items safe and make the most of the space.
Understanding Your Storage Needs
Before you even start looking at container sizes or rental companies, the first step is to really figure out what you need. It sounds obvious, but a lot of people skip this part and end up with a container that’s too small or way too big, which is just a waste of money and hassle. So, let’s break down how to get this right.
Assessing Space Requirements
Think about everything you plan to put in the container. Don’t just guess. Make a list. Are we talking about a few boxes of old photos and winter clothes, or are we packing up an entire garage full of tools and equipment? The more detailed your inventory, the better you can estimate the space you’ll actually need. It’s easy to underestimate, especially with bulky items. Try to visualize where each item will go. If you’re storing furniture, think about how much space a couch takes up, then add in the chairs, tables, and all the smaller stuff. It adds up fast.
Considering Item Types
What exactly are you storing? This matters more than you might think. Delicate items, like artwork or electronics, need to be packed carefully and might require extra padding. If you’re storing things that could be damaged by extreme temperatures or humidity – think old books, important documents, or certain types of furniture – you might need to look into specialized containers or at least be extra mindful of how you pack them. Things like tools or outdoor equipment are usually pretty tough, but you still want to keep them organized so they don’t damage each other.
Here’s a quick rundown of what to think about:
- Fragile Items: Artwork, electronics, glassware, heirlooms.
- Temperature/Humidity Sensitive: Books, documents, certain woods, musical instruments.
- Bulky/Heavy Items: Furniture, machinery, large appliances, tools.
- Hazardous Materials: Flammable liquids, chemicals (usually not allowed, so check rules!).
Determining Rental Duration
How long do you need the storage for? This is a big one for budgeting. Are you just using it for a few weeks while you renovate your kitchen? Or is this a longer-term solution, maybe for a business that needs extra inventory space for the next year? Most rental companies have different pricing structures based on how long you keep the container. Renting for a month is usually more expensive per day than renting for six months or a year. So, try to get a realistic timeframe. It’s better to overestimate slightly than to have to extend your rental at the last minute, which can sometimes come with extra fees or complications.
Getting your storage needs sorted upfront saves a lot of headaches down the road. It means you won’t be scrambling to find more space or paying for a container that’s mostly empty.
Choosing The Right Container
So, you’ve figured out roughly how much stuff you need to stash away. Now comes the fun part: picking the actual container. It’s not just about grabbing the biggest one you see; there’s a bit more to it than that. Think of it like picking out a tool for a specific job – you wouldn’t use a sledgehammer to hang a picture, right? Same idea here.
Selecting The Ideal Size
This is probably the most important decision you’ll make. Get this wrong, and you’re either paying for way more space than you need, or you’re going to be playing Tetris with your belongings, trying to cram them into a space that’s just too small. Most rental companies offer a few standard sizes, and they’re usually pretty straightforward.
- 10-foot containers: These are the little guys. Good for when you’ve got just a few things – maybe seasonal decorations, some old files for your home office, or a small amount of equipment. They’re also a lifesaver if you don’t have a lot of room to put the container on your property.
- 20-foot containers: This is the workhorse, the most popular size for a reason. It’s often enough space for the contents of a two-bedroom apartment or house. If you’re doing a moderate move or a decent-sized renovation, this is likely your sweet spot.
- 40-foot containers: These are the big kahunas. If you’re moving a larger home (think three or four bedrooms), have a lot of bulky business inventory, or are managing a big construction project, you’ll probably need this much room.
When you’re deciding, try to make a list of everything you plan to store. Measure any really big items, like a king-size mattress or a large appliance. It’s better to have a little extra room than to be short.
Evaluating Container Condition
When you’re looking at containers, you’ll usually have a choice between new, used, or refurbished. Each has its pros and cons.
- New Containers: These are pristine. No dents, no rust, just a clean slate. They’re great if you need your storage to look professional, like for a business, or if you’re storing items that are particularly sensitive.
- Used Containers: These are typically the most budget-friendly. They’ve seen some action, so expect some cosmetic wear and tear – maybe a few dings or some surface rust. As long as they’re structurally sound and watertight, they’re perfectly fine for most storage needs.
- Refurbished Containers: Think of these as the middle ground. They’re used containers that have been cleaned up, repaired, and often repainted. They offer a good balance between cost and appearance.
No matter what you choose, always check for major dents, rust spots, and make sure the doors seal properly. You want something that’s going to keep the weather out.
You’re looking for a container that’s solid and watertight. It doesn’t need to be showroom perfect, but it does need to protect your stuff from rain, wind, and anything else Mother Nature throws at it. Check the seals around the doors and look for any obvious holes or weak spots.
Exploring Container Types
While most rentals are standard steel shipping containers, there are a few variations you might encounter, depending on your needs.
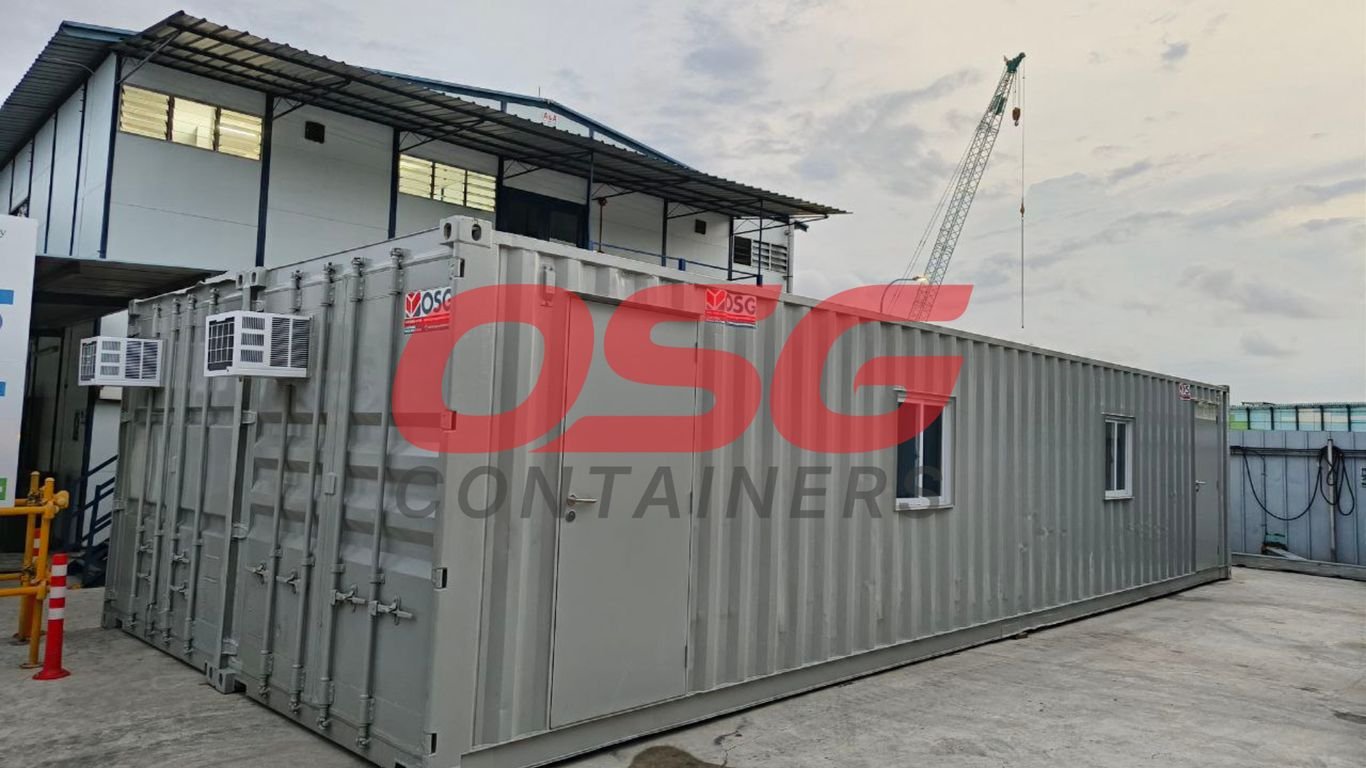
- Standard Containers: These are what most people think of. They’re made of steel, usually come in 20 or 40-foot lengths, and have a single set of doors on one end. They’re weather-resistant and secure, good for general storage.
- High Cube Containers: These are like standard containers but with a bit more headroom. They’re usually about a foot taller, which is handy if you’re storing tall items or need to stack things higher than usual.
- Open Side or Roll-Up Door Containers: Some companies might offer containers with doors on the side or a roll-up door, similar to a garage door. These can make loading and unloading bulky items much easier, especially if you don’t have a loading dock.
For most everyday storage needs, a standard container will do the trick. But if you’ve got unusually shaped or tall items, or if you’re dealing with a lot of large equipment, it’s worth asking if these other types are available.
Navigating Rental Agreements
Alright, so you’ve figured out what size container you need and where it’s going to go. The next big step is actually signing on the dotted line for the rental. This is where you’ll want to pay close attention, because the agreement is basically the rulebook for your rental. It might seem like a lot of small print, but understanding it can save you a lot of headaches down the road.
Understanding Rental Fees
First off, let’s talk money. The rental agreement will lay out all the costs involved. This isn’t just the monthly rental price; there are usually other fees to consider. You’ll see charges for delivery and pickup, and sometimes these can add up depending on how far they have to bring the container or take it away. It’s a good idea to get a clear breakdown of these fees upfront. Some companies might have different pricing structures, so asking questions is key.
Here’s a rough idea of what you might expect for monthly rental costs, though prices can change:
| Container Size | Approximate Monthly Cost |
|---|---|
| 10-foot | $130 – $200 |
| 20-foot | $150 – $230 |
| 40-foot | $120 – $250 |
Remember, these are just estimates. Longer rental periods might get you a better deal per month, so if you know you’ll need it for a while, ask about long-term rates. Also, keep an eye out for any special deals, especially during slower times of the year.
Reviewing Contract Terms
Beyond the fees, the contract spells out the nitty-gritty details of the rental period. This includes how long you’re renting the container for – is it month-to-month, or a fixed term? If it’s a fixed term, what happens if you need it longer? Can you extend it, and what’s the process? Make sure the rental duration matches your needs. You don’t want to be paying for it longer than you need it, or worse, have to scramble to get it picked up when your rental period unexpectedly ends.
It’s always a good practice to read through the entire contract before you sign. If anything seems confusing or you’re not sure about a particular clause, don’t hesitate to ask the rental company for clarification. They should be able to explain it in plain language.
Clarifying Damage and Insurance
This is a big one. What happens if the container gets damaged while it’s in your care? The agreement will outline your responsibilities. It’s important to know if the rental company provides any basic insurance or if you’re expected to get your own. Sometimes, your homeowner’s or business insurance might cover it, but you’ll need to check the specifics. Understanding who is liable for damage – whether it’s from weather, accidents, or even theft – is super important. You don’t want any surprises if something unfortunate happens.
Delivery and Placement Logistics
So, you’ve got your container sorted, but now comes the part where it actually shows up at your place. This isn’t just a case of the delivery guy dropping it off and driving away. There’s a bit more to think about to make sure everything goes smoothly.
Assessing Site Suitability
First things first, you gotta look at where this thing is going to sit. Is the ground level? Because if it’s all lopsided, your container doors might not close right, and that’s a pain. Plus, a wobbly container is just asking for trouble. You might need to do some prep work, like leveling the ground or even putting down a gravel or concrete pad. Think about what’s above, too. Are there low-hanging branches or power lines? You don’t want those getting in the way or causing a hazard. It’s really important to have a clear, flat spot ready before the container even gets there.
Checking Local Regulations
This is one of those things people sometimes forget. Depending on where you live – maybe you’re in a city with strict rules or a neighborhood with a homeowners association – there might be rules about where you can put a storage container. It’s worth a quick call to your local planning department or checking your HOA documents. You don’t want to get a notice saying you have to move it after it’s already been placed.
Planning Container Access
Once the container is in place, you need to be able to get to it, right? Think about how you’ll actually open the doors and move stuff in and out. Is there enough space in front of it? Can you get a car or truck close if you need to? Also, consider how you’ll lock it up. You’ll want a good spot that’s not too hidden away, making it less of a target for anyone snooping around.
Here’s a quick rundown of things to check:
- Ground Stability: Is it firm enough to hold the weight without sinking?
- Clearance: Plenty of room around the container for doors to open and for you to work.
- Overhead Obstructions: No branches, wires, or anything else that could cause a problem.
- Accessibility: Can you easily get to the container when you need to?
You’ll want to coordinate the delivery time with the rental company. Being there when it arrives lets you guide the driver and catch any issues right away. It’s way easier to sort things out in the moment than trying to fix a problem after the truck’s gone.
Maximizing Your Container Space
So, you’ve got your container, and it’s sitting there, ready to be filled. Now comes the part where you figure out how to fit everything without it turning into a giant, jumbled mess. It’s not just about shoving things in; it’s about smart packing. The way you arrange your items can literally double the usable space you have. Think of it like playing Tetris, but with your actual belongings.
Efficient Packing Strategies
Getting the most out of your container starts with how you pack. It might seem obvious, but a little planning goes a long way. Uniform boxes are your best friend here. They stack neatly, leaving fewer gaps, which means more stuff fits. If you’re storing furniture, take it apart. Remove the legs from tables, break down bed frames – anything to make them lie flatter and take up less room. And always, always label your boxes. You’ll be so glad you did when you’re looking for something specific later.
- Use sturdy, uniform boxes: They stack better than odd-shaped ones.
- Disassemble furniture: Take apart tables, chairs, and bed frames.
- Label everything clearly: Know what’s in each box before you need it.
- Protect fragile items: Wrap them well and place them in the center of stacks.
Utilizing Vertical Space
Don’t forget about the height of the container! Most people tend to pack outwards, forgetting there’s a whole lot of empty space above their heads. This is where stacking comes in. Put your heaviest, sturdiest items on the bottom. This not only makes the stack more stable but also frees up space on top for lighter things. Think about using shelves or creating platforms if you have a lot of smaller items. High cube containers are especially great for this, giving you that extra foot or so of height.
Ensuring Proper Ventilation
This is super important, especially if you’re storing items for a longer period or if the weather is humid. Poor ventilation can lead to mold, mildew, and general mustiness. Make sure there’s some airflow. You can do this by not packing items too tightly against the walls, leaving small gaps. If you’re storing sensitive items like furniture or fabrics, consider using moisture absorbers. It’s better to be safe than sorry when it comes to protecting your belongings from the elements inside the container.
Proper packing isn’t just about fitting more in; it’s about protecting your items from damage during transit and storage. A well-packed container means less stress when you unpack.
Securing Your Stored Items
Alright, so you’ve got your container, and it’s packed up nicely. Now comes the part where you want to make sure everything inside stays put and safe. It’s not just about locking the door; there are a few things to think about to really keep your stuff protected.
Choosing Robust Locking Mechanisms
First off, the lock. Don’t just grab any old padlock. Think about what you’re storing. If it’s just some old lawn furniture, maybe a basic heavy-duty padlock will do. But if you’ve got tools, business inventory, or anything you’d hate to lose, you’ll want something tougher. Look for locks made of hardened steel. Some have special features to make them harder to cut or break. It’s worth spending a little extra here. You want a lock that fits snugly in the container’s hasp, leaving as little wiggle room as possible for someone to get a pry bar in there.
Selecting Secure Locations
Where you put the container matters a lot. If it’s on your property, try to place it somewhere visible from your house or a neighbor’s. A dark, out-of-the-way spot is an open invitation. If you’re using a storage facility, ask about their security. Are there cameras? Is the place fenced? Is there someone on-site? A well-lit, monitored area is always better than a forgotten corner.
The best location is one that deters casual theft and makes it difficult for anyone to access the container without being noticed. Think about visibility and accessibility for yourself, but also for potential troublemakers.
Understanding Company Security Features
Some container rental companies offer more than just the box itself. They might have their own security measures. This could include things like:
- 24/7 Surveillance: Cameras watching the lot where your container sits.
- Gated Access: You might need a code or key to get into the facility.
- On-Site Staff: Someone is usually around during business hours, and sometimes even after.
- Regular Patrols: Some facilities have security guards who drive or walk around.
It’s a good idea to ask about these features when you’re comparing companies. It might cost a little more, but knowing your container is being watched can give you some serious peace of mind. It’s like having an extra layer of protection that you didn’t have to set up yourself.
Common Uses For Renting Containers
Renting a container, whether it’s a standard cargo container or a specialized unit, offers a flexible and practical way to manage space for a whole host of situations. These aren’t just for big shipping companies anymore; individuals and businesses of all sizes are finding them incredibly useful. The versatility of freight containers for rent makes them a go-to solution for temporary storage needs.
Residential Storage Solutions
For homeowners, container rental can be a lifesaver during major life events. Think about moving house – instead of rushing to pack everything into a moving truck, you can have a container delivered to your home. You then have days or even weeks to pack your belongings at your own pace. Once it’s loaded, the container can be transported to your new address or stored securely until you’re ready for it. It’s also a great option during home renovations. Keep your furniture, appliances, and valuables safe from dust, paint, and damage by storing them in a sturdy container right on your property. Seasonal items, like patio furniture in the winter or holiday decorations in the summer, can also be neatly tucked away.
- Moving and Relocation: Store items securely while transitioning between homes.
- Home Renovations: Protect furniture and belongings from construction mess.
- Seasonal Storage: Keep outdoor gear, decorations, or off-season clothing out of the way.
- Decluttering: Free up space in your home by storing less frequently used items.
When considering residential use, always check if your local area has any specific rules about where you can place a rental container on your property.
Business and Commercial Applications
Businesses frequently turn to container rental for a variety of reasons. Retailers might use them for overflow inventory, especially during peak seasons, avoiding the need to rent expensive warehouse space. Event organizers can use them for storing equipment, merchandise, or supplies for festivals, trade shows, or pop-up shops. For businesses undergoing office moves or renovations, a container provides a secure place for office furniture, files, and equipment. It’s a practical way to keep operations running smoothly without sacrificing valuable office or retail floor space.
| Business Type | Common Use Cases |
|---|---|
| Retail | Seasonal inventory, overflow stock, display items |
| Offices | Equipment storage during moves, document archiving |
| Events | Storing tents, stages, sound equipment, merchandise |
| E-commerce | Inventory management, order fulfillment overflow |
Construction Site Essentials
On construction sites, time is money, and efficient storage is key. Renting a container provides a secure, on-site location for tools, materials, and equipment. This means less time spent driving back and forth to an off-site storage facility and more time on the actual job. These durable steel units can hold everything from small hand tools to larger machinery and building supplies, keeping them protected from the elements and theft. Having a container on-site means your essential items are always within reach, helping to keep projects on schedule.
- Tool and Equipment Storage: Keep valuable machinery and tools secure and accessible.
- Material Storage: Protect lumber, drywall, and other building supplies from weather damage.
- On-Site Office/Break Room: Modified containers can serve as temporary site offices or break areas.
- Waste Management: Some containers can be adapted for on-site waste and debris containment.
Wrapping It Up
So, renting a storage container really does seem like a solid plan for a lot of situations. Whether you’re moving house, dealing with a big project, or just need some extra room for your business stuff, these containers offer a straightforward way to get that space without a huge hassle. We’ve gone over how to pick the right size, what to look for in a rental company, and even some tips to pack it all in efficiently. It’s all about finding what works for you, comparing your options, and making sure you’ve got a secure spot for your things. Hopefully, this guide has made the whole process feel a lot less complicated.
Frequently Asked Questions
How do I figure out what size container I need?
Think about all the stuff you need to store. Make a list and measure big items like furniture. Online tools can also help you guess how much space you’ll need. It’s better to get a slightly bigger container than one that’s too small.
Are the containers safe from bad weather and theft?
Most containers are made of strong steel and are built to handle rain, wind, and sun. They also have locks to keep your things safe. For extra security, pick a container with good locks and maybe even think about where you’ll put it.
How long can I rent a container for?
You can usually rent a container for as short or as long as you need. Many companies offer rentals by the month, so you can keep it for a few weeks or many months, depending on your project.
What kinds of things can’t I put in a rental container?
You generally can’t store dangerous materials, food that spoils easily, or anything illegal. Always check with the rental company to see their specific rules about what’s allowed and what’s not.
Can I move the container myself if I need to?
Some companies let you move the container, but usually, they have their own trucks to move it for you. If you need to move it to a new spot, talk to the rental company about their services and any extra costs.
What’s the difference between renting and buying a container?
Renting is good for short-term needs, like during a move or renovation, because it’s flexible and you don’t have to worry about upkeep. Buying is better if you need storage for a really long time or plan to change the container into something else, like an office.


